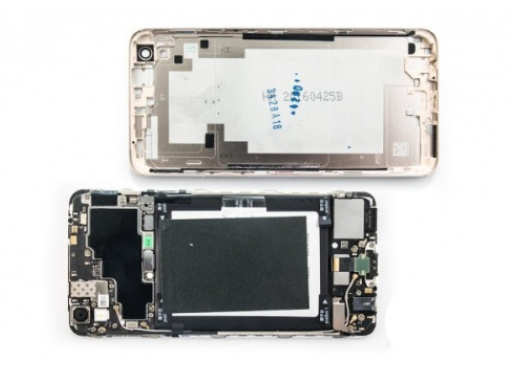
The instruction of the replacement for Rear Camera of Oppo R9

1. Please back up your data Before the repairs, and then power off your phone.

2. Insert the pin into the small hole, and then the slot will pop out and take out the slot.

3. Using a hexagon screwdriver to remove the two hexagon screws from the bottom of the phone. PS: it’s different from ordinary mobile phones. This mobile phone uses hexagon screws. Don’t use the wrong screwdriver. If the screw slips, then dear, congratulations. ![]()

4. Using a screen opener to grip the mobile phone. Remember to keep the stress points on both sides in the same position, then open a amall gap.

5. Then insert a triangle piece into the gap.

6. Using a crowbar to pry the screen apart along the edge. Pay attention to the internal fittings. The crowbar should not be inserted too deep.

7. Then the back cover can be detached. PS: there are no cables connected to the back cover of this mobile phone.

8. Use the pry bar to remove the battery cable buckle. PS: power off first, which can further reduce the loss of dismantling machine, although it is only a little impact.

9. Using the cross drewdriver to remove the 7 fixed screws from the motherboard.

10. Using the tweezer to remove the tail insert protection iron sheet.

11. Then using tweezer to remove the vibrator mounting bracket.

12. Remove the antenna clasp with a pry bar.

13. Using the pry bar to remove the display touch bar.

14. Using the pry bar to remove the tail cable buckle.

15. Then gently lift the motherboard, notice that under this position, there is a small tail board extension cable buckle. Generally, when the motherboard is lifted, the cable buckle will fall off. If it does not fall, use a tamper bar to remove it.

16. Then remove the motherboard. PS: the cameras are all on the motherboard.

17. Use the pry bar to loosen the fixed iron plate of the rear camera.

18. Then remove the fixed iron plate of the rear camera.

19. Turn the rear camera up and remove the rear camera cable buckle.

20. OK, we’ll start installing the rear camera. Buckle the rear camera cable.

21. Then install the rear camera cable fixed iron sheet. The fixed iron sheet of the rear camera is sticky. If it is not sticky, glue can be pasted on it.

22. Turn the rear camera over and fold it.

23. Align the position of the motherboard, and buckle the small board extension cable buckle under the motherboard. PS: if the cable buckle is successfully buckled, it will make a slight noise.

24. Using the cross screwdriver to install the three fixed screws.

25. Then button up the display touch cable buckle.

26. Buckle the tail cable.

27. Install the vibrator fixing bracket.

28. Install the protective iron sheet of tail plug-in cable.

29. Using the cross screwdriver to install the remaining screws.

30. Buckle the antenna.

31. Buckle the battery cable.

32. Align the top of the back cover, push it up and buckle it down. PS: if it can’t be covered, please check if the accessories are installed correctly or if something is stuck.

33. Then insert the card slot. PS: remember to put your SIM card in.

34. OK, turn on the phone to check whether the function is normal. PS: if the phone can’t be turned on, please make sure the battery is available.
And after confirming that the function of the mobile phone is OK, install the following two hexagon screws.

Post time: Sep-09-2020
